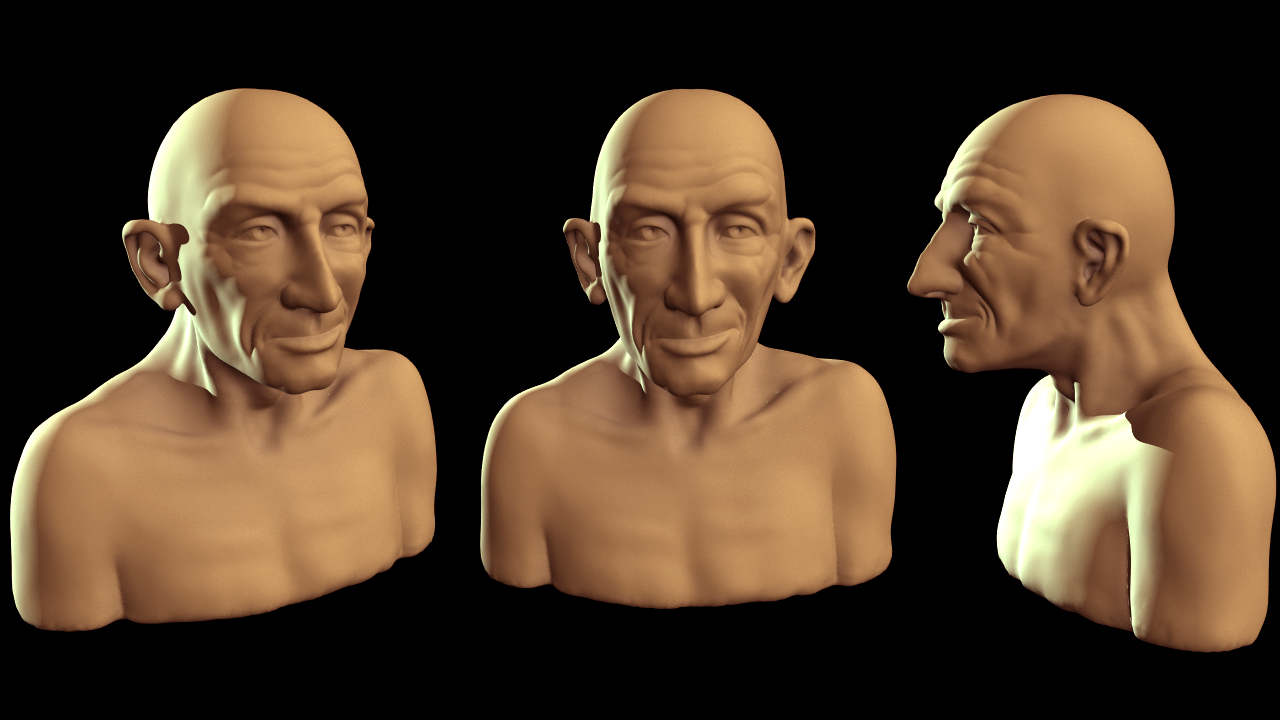
Originally, the image ‘The Contract’ was conceived incorporating a slight camera move. A moving camera can make the image feel more alive, you feel more ‘there’ when looking at a moving shot than looking at a still image. Sadly, when rendering time came that idea had to be abandoned. It took two days to render one still at 1080 HD, and the volumetric pass (one frame at 720 HD), which was only used for masking purposes, took nearly a week! With render times like these, rendering a ten second clip would take close to 6 years. Goodbye camera move…
Until last week. Since the only light which is lighting the scene is far outside the room and behind the camera the scene has to be rendered with Global Illumination (GI), and GI is slooow. The search is thus for a fast GI renderer. I first tried to use Octane for this, but ran into the limitations of my video card (see my previous post). With this option removed I turned to Kray. Kray is a fast GI renderer for LightWave. Now, I don’t use LightWave that much anymore, I’m in love with my Softimage which I find very flexible and easy to work with, so when creating ‘The Contract’ the thought of using Kray to render it never crossed my mind. Besides I only found out about the excessive render times when it was already too late.
LightWave is still a capable package though with a solid render engine, and being it one of my last options I set myself to the task of converting the scene to LightWave. Softimage has Pointoven with LightWave Object export build in, so transferring the scene from Softimage to LightWave was easy. Next was shader set up. Last December a new version of LightWave came out, LightWave 10, and with it came the VPR. Viewport Preview Render is what it stands for but actually it is a interactive preview renderer, a bit like Octane but using the CPU instead of the GPU. Using this VPR while setting up your shader trees is great, and it speeds up workflow tremendously, no more test renders needed. With the shaders set up it was time to start up Kray.
The week before I had played with this same scene and Kray in trying to make an acceptable clay render, which I finally managed to get with a render time of 45 minutes at 1080 HD. I knew it was gonna be quite a bit longer when I would be adding the shaders, but even 4 hours per frame would be usable.
I have a little render farm consisting of one 2.4 Ghz Q6600 PC with 4GB of RAM. I know, you can’t call that a render farm, you hardly can call it a computer these days, but since I normally work on my Mac Pro, this PC stands idle most of the time and so it has its hands free to do some render work for me. And if it is chugging along rendering day in and day out for a moth or more, that is no problem.
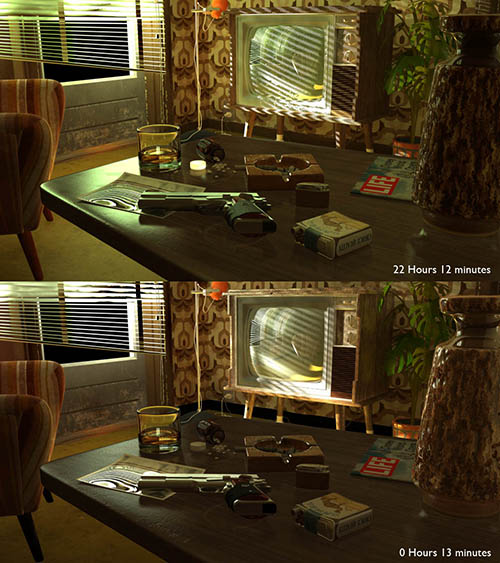
So I set my little PC to work and got a nasty surprise… it took Kray 22 hours at half resolution to complete one frame… This would mean that at full resolution it would take roughly 4 times as much, 4 days per frame which was twice as slow as Mental Ray (the render engine in Softimage). This was not what I had expected. I have to mention that most of that time, more then 20 hours, was used for anti aliasing.
To do a little experiment I changed all shaders from the node trees, which was how I had set them up, to the standard (old) LightWave material. Then I set it to render again with the same settings. Big was my surprise that this time Kray only needed 13 minutes. Something was wrong here. After some research on the Kray forums I was told that some LightWave nodes send huge numbers to Kray, which they are not supposed to do but which can result in huge render times. The trick is to find which shaders are the problem and change those.
This is the point where I am right now. So far I have three options left. One: abandon the project. I could, but I’m not frustrated enough yet to do that. Two: render the camera move with only the standard LightWave material. I won’t do that, the standard LightWave shader just doesn’t produce good enough results, if it comes to this I’d rather go for option one. Three: go hunting for the bugged shader. This should be do-able, I only used three or four different base shaders so the amount of work looks manageable.
It is settled then, I’ll go on another quest, not for speed this time but for bugs. If I succeed I’ll let you know.